
Replacing the windows in your home is a significant investment that can improve your home’s energy efficiency, appearance, and overall value. Whether you’re looking to replace a single window or all the windows in your house, understanding the costs involved is crucial. In this article, we’ll break down the various factors that influence window replacement costs, from the type of windows you choose to the materials and labor involved. By the end of this guide, you’ll have a clear understanding of what to expect when budgeting for window replacement in 2024.
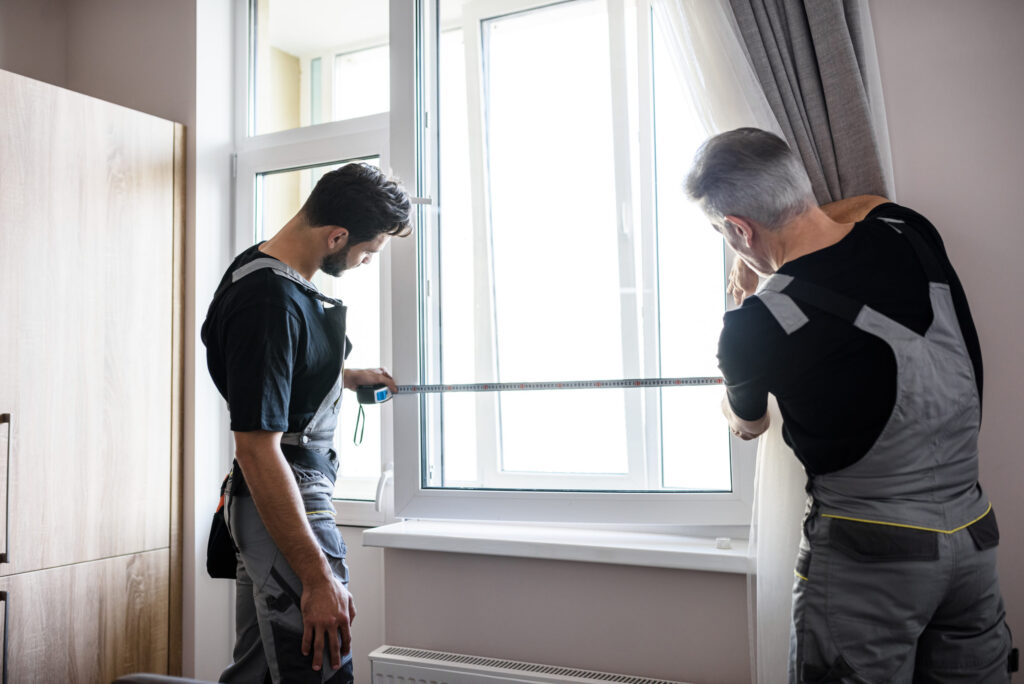
Table of Contents
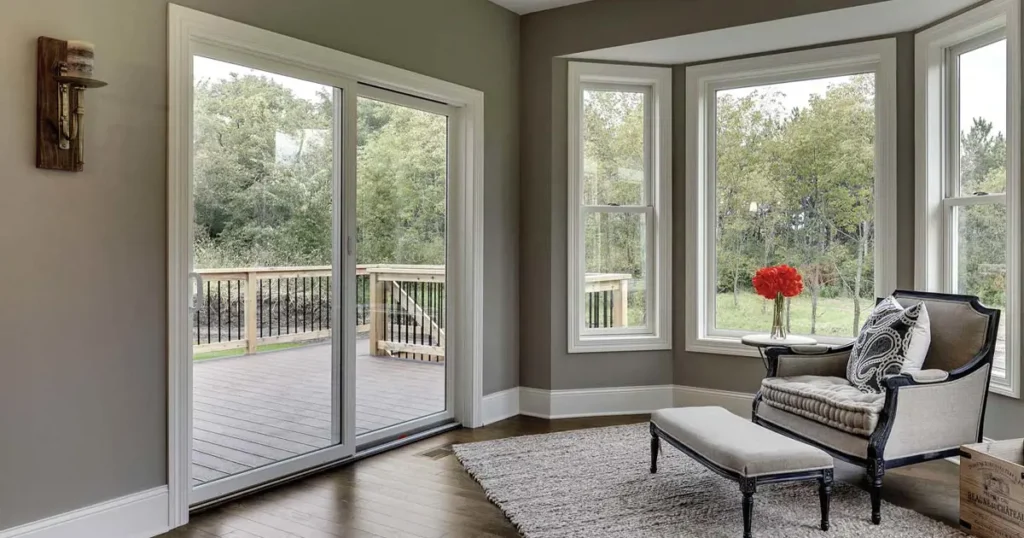
When it comes to replacing windows, the costs can vary widely depending on several factors. On average, homeowners can expect to pay between $300 and $1,200 per window for standard sizes and types. This cost typically includes both the price of the window itself and the labor needed for installation. However, more specialized windows, such as bay windows or windows with custom features, can cost significantly more. If you want a custom estimate from our window cost calculator, head to that page here!
Cost by Window Type
The type of window you choose has a major impact on the overall cost. Here’s a breakdown of some common window types and their average costs:
- Picture Windows: Picture windows are large, fixed windows that do not open. They are often used to provide an unobstructed view of the outdoors. Because they have no moving parts, picture windows are usually on the lower end of the cost spectrum, averaging between $300 and $800 per window.
- Single-Hung Windows: Single-hung windows have a fixed upper sash and a lower sash that can be opened. They are one of the more affordable options, typically costing between $150 and $600 per window.
- Double-Hung Windows: Double-hung windows are similar to single-hung windows, but both the upper and lower sashes can be opened. This feature makes them more versatile but also slightly more expensive, with costs ranging from $300 to $950 per window.
- Casement Windows: Casement windows are hinged on one side and open outward with the turn of a crank. They provide excellent ventilation and a tight seal when closed, making them energy efficient. Casement windows generally cost between $300 and $1,000 per window.
- Sliding Windows: Sliding windows operate by sliding one sash horizontally over the other. They are often used in spaces with limited vertical space, like basements or small bedrooms. Sliding windows usually cost between $200 and $800 per window.
- Skylight Windows: Skylights are windows installed in the roof, allowing natural light to enter from above. The cost of skylights varies greatly depending on size and features, with prices ranging from $1,000 to $2,500 per window.
- Storm Windows: Storm windows are installed over existing windows to provide extra insulation and protection from the elements. They are generally more affordable, costing between $150 and $450 per window.
- Bay Windows: Bay windows extend outward from the home, creating a small nook or shelf area inside. These windows are often custom-built, making them one of the more expensive options, with costs ranging from $1,500 to $3,500 per window.
- Egress Windows: Egress windows are designed to provide an emergency exit from a basement or lower level. Due to their size and safety features, they typically cost between $1,000 and $4,000 per window.
- Hopper Windows: Hopper windows are small, typically basement-level windows that open inward from the top. They are often used in tight spaces and cost between $150 and $400 per window.
- Jalousie Windows: Jalousie windows consist of several horizontal slats of glass that open like blinds. They are less common in modern homes but are still used in some climates. These windows cost between $175 and $500 per window.
Cost by Window Frame Material
The material used for your window frames also plays a significant role in determining the cost. Different materials offer various benefits in terms of durability, insulation, and aesthetics. Here’s what you can expect to pay based on the material:
- Aluminum Frames: Aluminum is a lightweight, durable material that is resistant to corrosion. It’s a popular choice for modern homes but doesn’t offer the same level of insulation as other materials. Aluminum frames usually cost between $250 and $700 per window.
- Vinyl Frames: Vinyl is one of the most common window frame materials due to its affordability, low maintenance, and energy efficiency. Vinyl windows typically range from $100 to $900 per window, making them an economical choice.
- Wood Frames: Wood windows offer a classic, timeless look and excellent insulation. However, they require regular maintenance to prevent rot and decay. Wood frames are on the higher end of the cost spectrum, usually ranging from $300 to $1,500 per window.
- Composite Frames: Composite frames are made from a blend of materials, including wood fibers and polymers. They offer the look of wood with lower maintenance and better durability. Composite windows generally cost between $300 and $1,200 per window.
- Fiberglass Frames: Fiberglass is an incredibly strong and energy-efficient material. It’s more durable than vinyl and requires less maintenance than wood. Fiberglass frames typically range from $400 to $1,500 per window.
Whole House Window Replacement Cost
Replacing all the windows in your home can be a daunting and expensive task, but it often comes with significant benefits in terms of energy efficiency, comfort, and resale value. The cost of a full-house window replacement varies based on the size of the home, the number of windows, and the types of windows you choose. Here’s what you can expect when budgeting for this kind of project.
How Much Does It Cost to Replace 25 Windows?
If your home has 25 windows, which is a common number for a medium to large-sized house, you’re looking at a substantial investment. On average, homeowners spend between $10,000 and $30,000 to replace 25 windows. This range can vary depending on the factors we’ve already discussed, such as window type and frame material. If you want a specialized quote for your project, use our window replacement cost calculator here!
- Budget-Friendly Options: If you opt for basic vinyl windows, which are both affordable and energy-efficient, you might spend closer to the lower end of the range—around $10,000 to $15,000. Vinyl is popular because it offers a good balance between cost, durability, and performance.
- Mid-Range Options: For a mid-range option, such as wood or composite windows, the cost could rise to between $15,000 and $25,000. These materials provide a more traditional look and better insulation but come with a higher price tag.
- High-End Options: If you choose premium materials like fiberglass or custom-made wood windows, the cost could escalate to $25,000 to $30,000 or even higher. These windows offer superior durability, insulation, and aesthetic appeal, making them a popular choice for luxury homes.
Energy Efficiency Considerations: It’s also worth noting that replacing all the windows in your home at once can lead to significant energy savings. Modern windows are designed to reduce heat loss in winter and keep your home cooler in the summer, which can lower your energy bills and make the investment more worthwhile in the long run.
Cost by Energy Efficiency and Glass Type: If you’re particularly concerned about energy efficiency, investing in double or triple-pane windows with low-emissivity (Low-E) coatings can further increase costs but will provide even greater savings on your utility bills over time. These windows generally add $50 to $150 per window but can make a noticeable difference in your home’s comfort and energy use.
Factors That Determine Window Replacement Costs
Several key factors influence the overall cost of replacing windows in your home. Understanding these factors can help you make more informed decisions when selecting windows and planning your budget.
Window Size and Material
The size and material of your windows are two of the most significant factors in determining the overall cost of replacement. Larger windows naturally require more materials and labor, leading to higher costs. Custom-sized windows also tend to be more expensive than standard sizes due to the additional work involved in manufacturing and installation.
- Window Size: Larger windows, such as picture or bay windows, will cost more to replace than smaller, standard-sized windows. For example, a small double-hung window might cost around $300, while a large bay window could cost upwards of $2,500.
- Window Material: As mentioned earlier, the material you choose for your window frames—whether it’s aluminum, vinyl, wood, composite, or fiberglass—also plays a significant role in the cost. Each material has its own set of benefits and price points, so it’s important to weigh your options carefully based on your budget and needs.
Window Style
The style of the window you choose can also impact the overall cost. Some styles are more complex to manufacture and install, which can drive up the price.
- Single-Hung vs. Double-Hung: While single-hung windows are generally less expensive due to their simpler design, double-hung windows offer more functionality and ventilation options, making them a slightly more costly option.
- Casement Windows: Casement windows, which open outward with a crank, can be more expensive than single-hung or sliding windows due to the added hardware and more complex installation process.
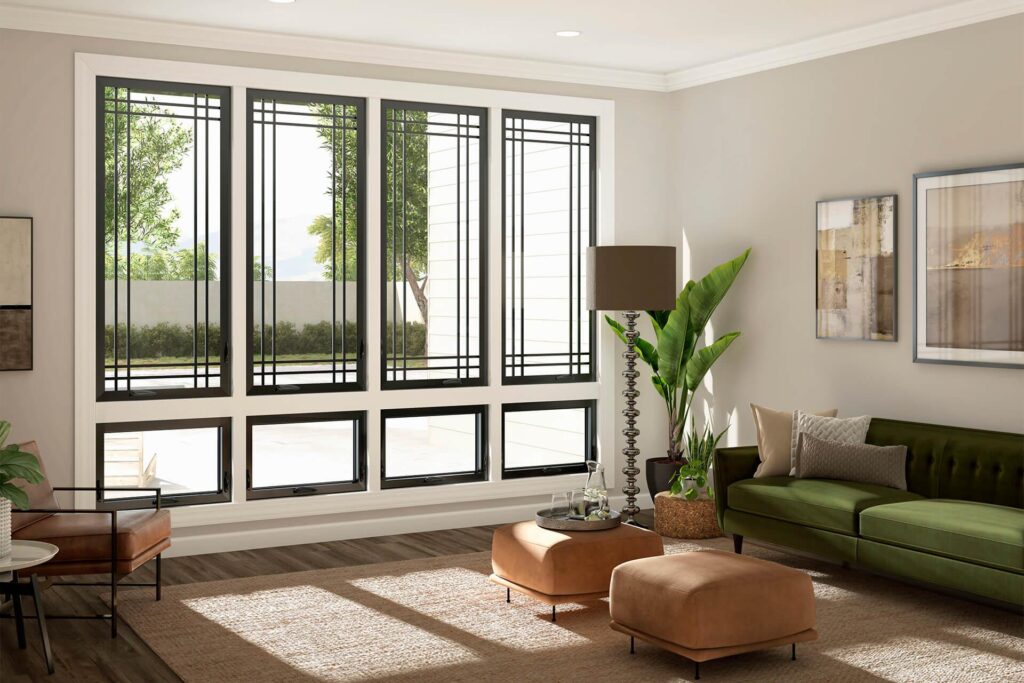
- Specialty Windows: Specialty windows, such as bay, bow, or egress windows, are typically more expensive due to their custom design and the additional labor required for installation. These windows often serve both functional and aesthetic purposes, making them a popular choice despite the higher cost.
Window Location
The location of the windows in your home can also affect the cost of replacement. Windows that are difficult to access or require additional work to install will naturally cost more to replace.
- Ground Floor vs. Upper Floors: Windows on the ground floor are generally easier and less expensive to replace than windows on upper floors or in hard-to-reach areas like attics or basements.
- Basement and Egress Windows: Replacing basement windows, especially egress windows, can be more expensive due to the need for excavation, structural modifications, and specialized installation techniques.
Home Size
The size of your home and the number of windows you need to replace will directly impact the overall cost. Larger homes with more windows will require a greater investment, both in terms of materials and labor.
- Small Homes: Smaller homes with fewer windows may only need to budget for a handful of replacements, keeping costs relatively low.
- Large Homes: Larger homes, especially those with custom or high-end windows, will face higher costs due to the increased number of windows and the potential for more complex installations.
Geographic Location
Where you live can also influence the cost of window replacement. Labor rates, material availability, and climate considerations vary by region, all of which can impact the final price.
- Urban vs. Rural Areas: Urban areas often have higher labor costs due to the increased cost of living, which can drive up the overall cost of window replacement. Conversely, rural areas may have lower labor costs but might face higher material costs if supplies need to be shipped from a distance.
- Climate Considerations: In areas with extreme weather conditions, such as harsh winters or hot summers, investing in energy-efficient windows might be more critical, adding to the overall cost.
Labor
Labor costs are another significant factor in window replacement. The complexity of the installation, the number of windows, and the accessibility of the windows all play a role in determining how much you’ll pay for labor.
- Standard Installation: For a straightforward installation of standard-sized windows, labor costs typically range from $100 to $300 per window. However, this can vary based on the factors mentioned above.
- Complex Installations: If your windows require custom fitting, additional framing, or structural modifications, the labor costs can increase significantly. This is especially true for specialty windows or windows in hard-to-reach areas.
Window Brand
Finally, the brand of windows you choose can affect the overall cost. Well-known, reputable brands often come with a higher price tag due to their quality, durability, and warranty offerings.
- Premium Brands: Premium brands like Milgard, Andersen, and Pella are known for their high-quality materials and craftsmanship, but they also tend to be more expensive.
- Budget Brands: There are also more budget-friendly options available from lesser-known brands, but it’s important to research their performance and warranty to ensure you’re making a wise investment.
Additional Costs and Considerations Associated With Window Replacement
When planning for window replacement, it’s essential to account for additional costs beyond just the windows and installation. These extra expenses can add up, so understanding them ahead of time will help you better prepare your budget and avoid surprises.
Disposal of Materials
One of the often-overlooked costs of window replacement is the disposal of old windows and materials. Many contractors will include the removal and disposal of your old windows as part of their service, but this might come with an additional fee.
- Standard Disposal Fees: Depending on your location and the contractor, disposal fees can range from $50 to $100 per window. This fee covers the removal of the old windows, including any glass, frames, and debris.
- Recycling Options: Some materials, like aluminum frames or certain types of glass, can be recycled. If you’re environmentally conscious, you might want to check with your contractor to see if recycling options are available. Recycling can sometimes reduce disposal costs, although it might not be available in all areas.
Retrofit Replacement Cost vs. Full-Frame Replacements
When replacing windows, you’ll need to choose between retrofit replacement (also known as insert replacement) and full-frame replacement. Each option comes with different costs and considerations.
- Retrofit Replacement: In a retrofit replacement, the new window is installed within the existing frame. This method is generally less expensive because it involves less labor and fewer materials. Retrofit replacements are ideal for homes where the existing window frames are still in good condition. Costs typically range from $200 to $1,000 per window.
- Full-Frame Replacement: A full-frame replacement involves removing the entire window, including the frame, and installing a completely new unit. This option is more expensive due to the increased labor and materials required, but it’s often necessary for older homes or when the existing frames are damaged or no longer energy efficient. Full-frame replacements can cost between $400 and $2,000 per window, depending on the size and material.
Structural Repairs
During the window replacement process, you might discover that your home needs additional structural repairs. These repairs can include fixing rotted wood, repairing damaged drywall, or addressing issues with the surrounding wall. Structural repairs are often unexpected, so it’s important to set aside a portion of your budget for these potential costs.
- Common Repairs: Common repairs might include replacing rotted wood around the window frame, repairing damaged or uneven surfaces, and fixing insulation issues. Costs for these repairs can vary widely, typically ranging from $50 to $500 per window, depending on the severity of the issue.
- Hidden Damage: In some cases, removing old windows might reveal hidden damage that wasn’t apparent before, such as mold or water damage. Addressing these issues is crucial to maintaining the structural integrity of your home, but it can significantly increase the overall cost of the project.
Weatherproofing and Insulation
Proper weatherproofing and insulation are essential for ensuring that your new windows perform as expected. Failing to adequately weatherproof your windows can lead to drafts, energy loss, and potential water damage.
- Weatherproofing Costs: Weatherproofing materials, such as sealant and weatherstripping, are typically included in the installation cost. However, if your home requires additional measures, such as exterior caulking or custom flashing, there may be an extra charge. These costs can range from $50 to $200 per window.
- Insulation Upgrades: If your home has poor insulation around the windows, it may be worth upgrading the insulation during the window replacement process. High-quality insulation can reduce energy loss and improve the overall comfort of your home. Insulation upgrades might add an additional $100 to $300 per window to your overall costs.
Window Location
The location of the windows within your home can affect both the cost and complexity of the replacement process. Certain windows, like those on upper floors or in basements, may require special equipment or additional labor, increasing the overall cost.
- Upper Floors: Replacing windows on upper floors often requires the use of scaffolding or ladders, which can add to labor costs. Additionally, windows in hard-to-reach areas may take longer to install, further increasing costs.
- Basement Windows: Basement windows, especially egress windows, often require excavation or structural modifications to meet building codes, adding to the cost. Egress windows, which are designed for emergency exits, can be particularly expensive due to their size and the need for proper installation.
How to Finance New Windows
Replacing windows is a significant financial investment, and not all homeowners have the cash on hand to pay for it upfront. Fortunately, there are several financing options available that can help spread the cost over time, making it more manageable.
Personal Loans
One of the most common ways to finance a window replacement project is through a personal loan. Personal loans are typically unsecured, meaning you don’t need to put up your home or other assets as collateral. The loan amount, interest rate, and repayment terms will vary based on your credit score, income, and the lender’s policies.
- Pros: Personal loans offer a straightforward way to finance your project with fixed interest rates and predictable monthly payments. Since they are unsecured, you don’t risk losing your home if you can’t make the payments.
- Cons: Interest rates on personal loans can be higher than other financing options, especially if you have a lower credit score. Additionally, loan terms may be shorter, which means higher monthly payments.
Home Equity Loans
Home equity loans allow you to borrow against the equity you’ve built up in your home. This type of loan is secured by your home, meaning the lender can foreclose if you fail to repay the loan. Home equity loans typically offer lower interest rates than personal loans because they are secured, and they often come with longer repayment terms.
- Pros: Home equity loans usually have lower interest rates, making them a cost-effective way to finance large projects. They also offer longer repayment terms, which can result in lower monthly payments.
- Cons: Since the loan is secured by your home, there’s a risk of foreclosure if you can’t make your payments. Additionally, the loan approval process can be longer and more involved, requiring an appraisal and other documentation.
Home Equity Line of Credit (HELOC)
A Home Equity Line of Credit (HELOC) is another option for financing your window replacement. Unlike a home equity loan, a HELOC operates like a credit card, allowing you to borrow money as needed up to a certain limit. This flexibility can be beneficial if you’re not sure exactly how much the project will cost or if you want to have funds available for future home improvements.
- Pros: HELOCs offer flexibility, allowing you to borrow only what you need, when you need it. Interest rates are typically lower than those on personal loans, and you only pay interest on the amount you’ve borrowed.
- Cons: HELOCs are also secured by your home, so the same risks apply if you can’t make your payments. Additionally, interest rates on HELOCs are often variable, which means your monthly payments could increase over time.
Credit Cards
For smaller window replacement projects or partial replacements, using a credit card might be a viable option. Some credit cards offer introductory 0% APR periods, allowing you to finance the project without paying interest if you can pay off the balance within the promotional period.
- Pros: Credit cards offer convenience and can be a good option for smaller projects. If you qualify for a card with a 0% APR introductory period, you can finance your project interest-free for a limited time.
- Cons: Interest rates on credit cards can be very high after the introductory period ends, making this an expensive option if you can’t pay off the balance quickly. Additionally, large balances on credit cards can negatively impact your credit score.
Financing Through the Window Company
Some window companies offer financing plans directly to their customers. These plans might include promotional rates, such as 0% APR for a certain period, or longer-term financing options.
- Pros: Financing through the window company can be convenient and might come with promotional offers that are not available elsewhere. It also simplifies the process by combining the financing and purchase into one transaction.
- Cons: Interest rates and terms can vary, so it’s important to read the fine print and compare the company’s offer to other financing options. In some cases, the cost of financing may be higher than other loan options.
Government Programs and Incentives
In some cases, government programs or incentives might be available to help offset the cost of window replacement, particularly if the new windows are energy-efficient.
- Energy-Efficient Tax Credits: The federal government and some state governments offer tax credits for energy-efficient home improvements, including window replacements. These credits can reduce your tax liability, effectively lowering the overall cost of the project.
- Local Grants and Loans: Some local governments or utility companies offer grants, low-interest loans, or rebates for energy-efficient upgrades. Check with your local authorities or utility provider to see if any programs are available in your area.
How to Know If You Need Replacement Windows
Deciding whether or not to replace your windows can be a challenging decision. While new windows can improve your home’s energy efficiency, comfort, and appearance, they also represent a significant investment. Here are some key signs that it might be time to consider window replacement.
Signs of Physical Damage
One of the most obvious indicators that your windows need to be replaced is visible damage. This can include cracks, chips, or warping in the window frames, as well as broken or foggy glass.
- Cracked or Broken Glass: If your windows have cracked or broken glass, they not only look unsightly but also pose safety risks and reduce your home’s energy efficiency. Replacing the glass or the entire window can restore the safety and function of your windows.
- Warped or Rotting Frames: Wooden window frames are particularly susceptible to warping and rotting over time, especially in areas with high humidity or frequent rainfall. Warped or rotting frames can lead to drafts, leaks, and difficulty opening or closing the windows.
- Difficulty Operating Windows: If you find it hard to open or close your windows, it might be due to warping, rusted hinges, or broken components. Windows that don’t operate properly can be a safety hazard and might indicate that a replacement is needed.
Drafts and Increased Energy Bills
If you’ve noticed a significant increase in your energy bills, your windows might be to blame. Older or damaged windows can allow drafts to enter your home, forcing your heating and cooling systems to work harder to maintain a comfortable temperature.
- Feeling Drafts: If you can feel cold air coming in around your windows in the winter or hot air during the summer, it’s a clear sign that your windows aren’t sealing properly. This could be due to poor installation, worn-out weatherstripping, or aging window materials.
- Increased Energy Bills: Drafty windows can cause your HVAC system to run more frequently, leading to higher energy bills. If you’ve noticed a sudden increase in your energy costs, especially during peak heating or cooling seasons, your windows might be contributing to the problem.
Condensation and Moisture Buildup
Condensation or moisture buildup between the panes of double- or triple-pane windows is a sign that the seals have failed, compromising the insulating properties of the windows.
- Foggy Windows: If you notice a persistent fog or condensation between the panes of your windows, it’s a sign that the insulating gas (such as argon or krypton) has leaked out, and the window is no longer performing efficiently. This can lead to reduced energy efficiency and potential water damage.
- Water Damage: Moisture buildup around the windows can lead to mold, mildew, and rot. If you see signs of water damage, such as peeling paint, stained walls, or mold growth, it’s important to address the issue promptly to prevent further damage to your home’s structure.
Noise Reduction
Older windows or windows that have lost their seals can allow outside noise to enter your home more easily. If you’ve noticed that your home is no longer as quiet as it used to be, it might be time to consider new windows with better soundproofing capabilities.
- Increased Noise Levels: If you hear more outside noise than usual, especially if you live near a busy street or in a noisy neighborhood, your windows may no longer be providing adequate sound insulation. Modern windows are designed to reduce noise significantly, improving the overall comfort of your home.
Fading Furniture and Flooring
Windows that allow excessive UV rays into your home can cause your furniture, flooring, and other interior elements to fade over time. New windows with Low-E (low-emissivity) coatings can help protect your home’s interior from harmful UV rays.
- Faded Fabrics and Surfaces: If you’ve noticed that your furniture, carpets, or hardwood floors are fading, it might be due to UV exposure through your windows. Replacing your windows with those that have Low-E coatings can help block UV rays and preserve the appearance of your home’s interior.
Age of the Windows
Even if your windows aren’t showing obvious signs of damage, their age alone might be a reason to consider replacement. Most windows have a lifespan of 15 to 30 years, depending on the material and quality of installation.
- Older Windows: If your windows are more than 20 years old, they may no longer be as energy-efficient or functional as newer models. Advances in window technology have led to significant improvements in energy efficiency, durability, and overall performance. Sometimes replacing just one window to see the difference can be smart!
Resale Value
If you’re planning to sell your home in the near future, replacing old or damaged windows can be a wise investment. New windows can enhance your home’s curb appeal, increase its value, and attract potential buyers.
- Improved Curb Appeal: New windows can dramatically improve the appearance of your home, making it more attractive to potential buyers. This can be especially important in a competitive real estate market.
- Increased Home Value: Replacing windows is one of the home improvements that can offer a good return on investment. Buyers are often willing to pay more for a home with new, energy-efficient windows, knowing that they won’t have to worry about replacement costs for many years.
Installing Replacement Windows Yourself vs. Hiring a Professional
Once you’ve decided to replace your windows, the next question is whether to do it yourself or hire a professional. Each option has its pros and cons, and the best choice depends on your experience, the complexity of the job, and your budget.
DIY Window Replacement
If you’re handy and enjoy tackling home improvement projects, you might consider replacing your windows yourself. DIY window replacement can save you money on labor costs, but it also comes with certain risks and challenges.
- Cost Savings: One of the main advantages of DIY window replacement is the potential cost savings. By doing the work yourself, you can avoid paying for professional labor, which can be a significant portion of the overall cost. However, it’s important to consider the cost of tools, materials, and any potential mistakes that might arise.
- Control Over the Project: DIY installation gives you complete control over the project, from choosing the windows to the installation process itself. This can be appealing if you have specific preferences or if you want to work on your own schedule.
Challenges of DIY Window Replacement
- Skill Level: Installing windows requires a certain level of skill and experience. If you’ve never done it before, you might find the process more challenging than anticipated. Improper installation can lead to issues such as drafts, leaks, and reduced energy efficiency, which could end up costing you more in the long run to fix.
- Time Commitment: Replacing windows is a time-consuming process, especially if you’re doing it for the first time. Depending on the number of windows you’re replacing and your level of experience, it could take several days or even weeks to complete the project.
- Tools and Equipment: Proper window installation requires specific tools and equipment, some of which you might not already own. While you can rent or purchase these tools, it’s an additional cost to consider. Using the wrong tools or not having the right equipment can lead to mistakes during the installation process.
Hiring a Professional Window Installer
Hiring a professional window installer can offer peace of mind and ensure that the job is done correctly. While it’s more expensive than a DIY approach, professional installation comes with several advantages.
- Expertise and Experience: Professional window installers have the experience and knowledge to handle all aspects of window replacement, from removing old windows to installing new ones correctly. They’re trained to deal with any issues that might arise during the installation, ensuring that your windows are properly fitted and sealed.
- Warranty and Guarantees: Most professional installers offer warranties on their work, which can provide added protection in case of any issues after installation. Additionally, many window manufacturers require professional installation for their warranties to remain valid.
Considerations When Hiring a Professional
- Cost: Hiring a professional installer will increase the overall cost of your window replacement project. Labor costs can vary depending on the complexity of the job, the number of windows, and your location, but they generally range from $100 to $300 per window.
- Finding a Qualified Installer: It’s important to research and choose a reputable window installer with good reviews and experience. Ask for references, check their credentials, and get multiple quotes to ensure you’re getting a fair price for the work.
When to Consider DIY vs. Professional Installation
- Simple Replacements: If you’re replacing a single window or a few standard-sized windows in an accessible location, DIY might be a viable option if you have the necessary skills and tools.
- Complex Installations: For more complex installations, such as replacing multiple windows, custom-sized windows, or windows in difficult-to-reach areas, hiring a professional is often the better choice. Professionals can handle the job efficiently and ensure that the windows are installed correctly, preventing potential issues down the road.
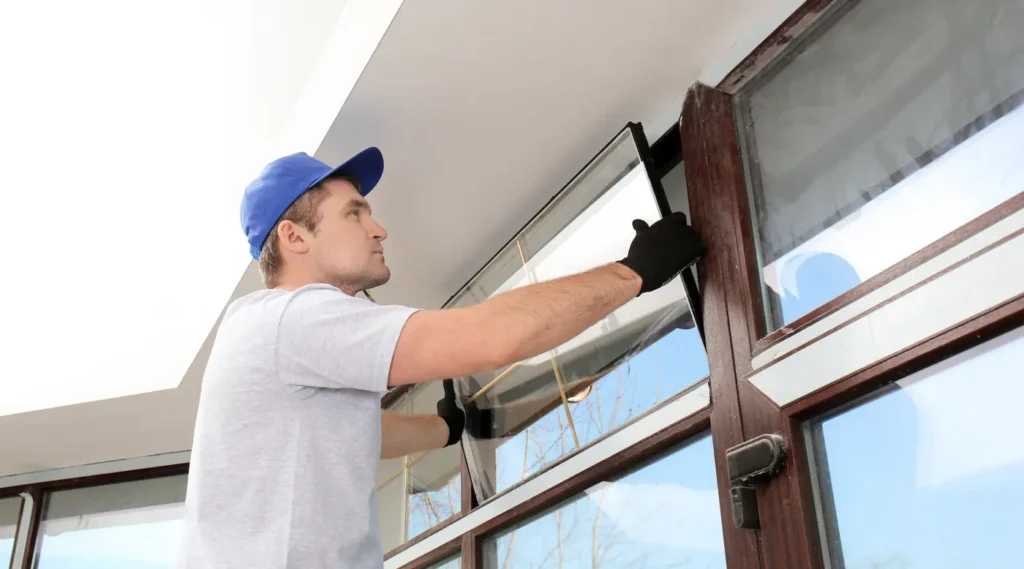
How Does Window Replacement Work?
Understanding the window replacement process can help you better prepare for the project and ensure that everything goes smoothly. While the specifics may vary depending on the type of windows and the installer you choose, the general steps involved in window replacement are fairly consistent. Here’s an overview of what to expect during the installation process.
Step 1: Remove the Old Window
The first step in the window replacement process is to remove the old window. This involves carefully taking out the existing window sash, frame, and any trim or molding around the window.
- Protecting the Surrounding Area: Before the removal process begins, the installer will take measures to protect the surrounding area. This might include laying down drop cloths to catch debris and dust, and removing or covering nearby furniture.
- Removing the Sash and Frame: The sash is the part of the window that holds the glass panes in place. For most windows, the sash is removed first, followed by the frame. Depending on the age and condition of the window, this process might be straightforward or require additional effort to remove old, stuck, or rotting components.
- Inspecting for Damage: Once the window is removed, the installer will inspect the opening for any signs of damage, such as rot, mold, or structural issues. If damage is found, it will need to be repaired before the new window can be installed.
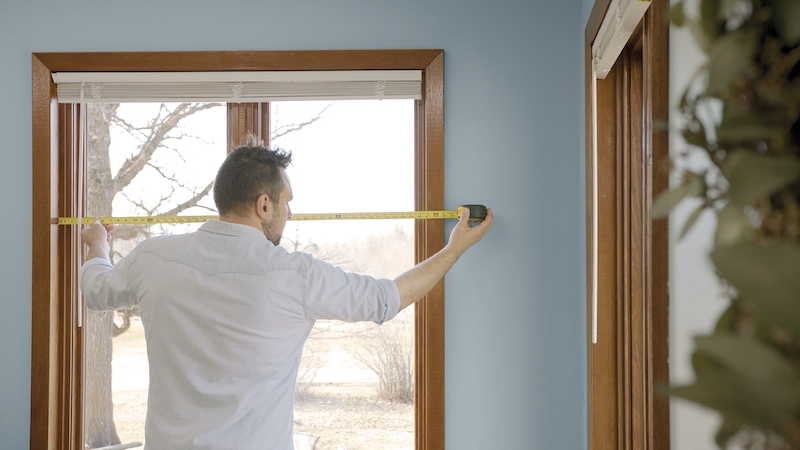
Step 2: Frame Preparation
After the old window is removed, the next step is to prepare the window opening for the new window. Proper preparation is essential to ensure a good fit and optimal performance of the new window.
- Cleaning and Leveling the Opening: The installer will clean the window opening to remove any debris, old caulking, or adhesive. The opening must be level and square to ensure that the new window fits properly. If the opening is not level, the installer may need to make adjustments or use shims to correct any irregularities.
- Repairing or Replacing the Frame: If the frame or surrounding structure shows signs of damage, such as rotting wood or compromised insulation, the installer will make the necessary repairs. This might involve replacing sections of the frame, adding insulation, or applying a waterproof membrane to prevent future moisture issues.
Installing Flashing and Weatherproofing Materials
- Flashing Installation: Flashing is a thin, waterproof material that is installed around the edges of the window opening to prevent water from seeping into the walls. The installer will apply flashing tape or metal flashing around the perimeter of the opening to create a watertight seal.
- Adding Insulation: To improve energy efficiency, the installer may add insulation around the window opening before installing the new window. This can help reduce drafts and improve the overall comfort of your home.
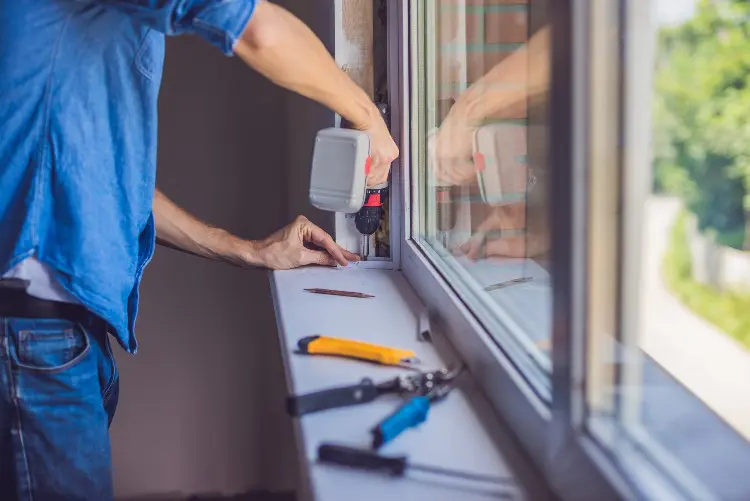
Step 3: Install the New Windows
With the window opening prepared, the new window can be installed. This step involves carefully placing the new window into the opening, securing it in place, and ensuring that it operates correctly.
- Positioning the Window: The installer will carefully position the new window into the opening, making sure that it is level, square, and centered. Shims may be used to adjust the window’s position and ensure a tight fit.
- Securing the Window: Once the window is properly positioned, the installer will secure it in place using screws or nails. These fasteners are typically placed through the window frame and into the surrounding wall to provide a stable and secure installation.
- Checking Operation: After the window is secured, the installer will check that it opens, closes, and locks smoothly. Any necessary adjustments will be made at this stage to ensure that the window operates correctly and provides a tight seal.
Sealing the Edges and Adding Trim
- Applying Caulk: To create a weatherproof seal, the installer will apply a bead of caulk around the edges of the window frame where it meets the wall. This helps to prevent air and water from entering the home and improves energy efficiency.
- Installing Trim and Molding: The final step in the installation process is to add trim or molding around the window to cover any gaps and create a finished appearance. The trim is usually nailed or screwed into place, and any gaps are filled with caulk for a seamless look.
Step 4: Seal and Finish the New Window
After the new window is installed and secured, the finishing touches are applied to ensure that the window looks great and performs well for years to come.
- Painting or Staining: If the window frame or trim is made of wood, it may need to be painted or stained to match the rest of your home’s interior or exterior. This step may be done immediately after installation or at a later time, depending on your preferences.
- Final Inspection: The installer will conduct a final inspection of the window to ensure that everything is properly sealed and that the window operates smoothly. They may also clean up any debris and remove protective coverings from the surrounding area.
Cleaning Up and Disposal
- Cleaning the Area: The installer will clean up the work area, removing any debris, old window materials, and tools. They will also clean the new windows, removing any fingerprints, dust, or smudges that may have accumulated during installation.
- Disposing of Old Windows: If the contractor includes disposal in their service, they will take care of removing and properly disposing of your old windows. If not, you may need to arrange for disposal or recycling yourself.
Professional vs. DIY Window Replacement
When it comes to window replacement, homeowners often wonder whether they should take on the project themselves or hire a professional. Each option has its own set of advantages and disadvantages, and the right choice depends on various factors, including your skill level, the complexity of the job, and your budget.
Code Compliance
One of the most important considerations in window replacement is ensuring that the installation meets local building codes and regulations. This is particularly important if you are making significant changes to your windows, such as enlarging openings or adding egress windows.
- Understanding Local Codes: Building codes vary by location, and they dictate everything from the size and type of windows required in certain areas to the methods used for installation. Professionals are familiar with these codes and can ensure that your window replacement meets all legal requirements.
- Passing Inspections: If your window replacement project requires a building permit, it will likely also require an inspection by a local building official. Hiring a professional can give you peace of mind that the installation will pass inspection without any issues.
Expertise
Professional window installers bring a level of expertise to the job that can be difficult for DIYers to match. Their experience allows them to handle unexpected challenges and ensures that the installation is done correctly the first time.
- Handling Complications: If your home has older windows, non-standard sizes, or structural issues, a professional installer will know how to address these challenges effectively. DIYers may struggle with these complications, leading to potential mistakes and additional costs.
- Proper Tools and Techniques: Professional installers have the tools and knowledge necessary to complete the job efficiently and with high-quality results. They understand the best techniques for sealing, insulating, and weatherproofing windows, which can be critical for long-term performance.
Safety
Safety is another key factor to consider when deciding between DIY and professional window replacement. Installing windows can be hazardous, particularly if the windows are large or located on upper floors.
- Working at Heights: Installing windows on upper floors or in hard-to-reach areas can be dangerous without the proper equipment and experience. Professional installers are trained to work safely in these conditions, reducing the risk of injury.
- Heavy Lifting: Windows, especially large or custom models, can be heavy and awkward to handle. Professionals have the experience and tools to lift and install these windows safely, minimizing the risk of damage to the windows or your home.
Warranty Compliance
Many window manufacturers offer warranties that cover defects in materials or workmanship. However, these warranties often require that the windows be installed by a professional in order to remain valid.
- Protecting Your Investment: By hiring a professional, you can ensure that your warranty remains intact, providing protection against potential issues down the road. DIY installation, on the other hand, could void the warranty, leaving you responsible for any repairs or replacements.
- Manufacturer’s Requirements: Some manufacturers have specific installation guidelines that must be followed to maintain the warranty. Professional installers are familiar with these requirements and can ensure that the installation meets the manufacturer’s standards.
When to Choose DIY
- Small, Simple Projects: If you’re replacing just one or two standard-sized windows and you have the necessary skills and tools, DIY can be a cost-effective option. Simple installations in easily accessible areas are the best candidates for DIY replacement.
- Budget Constraints: If your budget is tight and you’re comfortable with home improvement projects, DIY installation can save you money on labor costs. Just be sure to weigh the potential risks and challenges before committing to the project.
When to Hire a Professional
- Large or Complex Projects: For large-scale replacements, custom windows, or projects involving multiple floors, it’s usually best to hire a professional. Their expertise and efficiency can save you time, money, and headaches in the long run.
- Ensuring Quality and Compliance: If you want to ensure that the job is done to the highest standards and that your warranty remains valid, hiring a professional is the safest choice. They will handle all aspects of the installation, from obtaining permits to passing inspections.
Questions to Ask Professional Window Installers
Hiring a professional window installer is a significant step in ensuring your window replacement project goes smoothly. However, not all installers are created equal, and it’s important to ask the right questions to make sure you’re hiring someone who is qualified, experienced, and trustworthy. Here are some key questions to ask potential window installers before making your final decision.
Cost Questions
Understanding the cost of your window replacement project is crucial, and these questions can help you get a clear picture of what to expect financially.
- What is included in your quote? It’s important to know exactly what the installer’s quote covers. Does it include the cost of the windows themselves, labor, disposal of old windows, and any additional materials or services? Clarify whether there might be any additional fees that aren’t included in the initial quote.
- Are there any potential additional costs? Ask the installer if there are any circumstances that could lead to additional charges, such as unexpected structural repairs or custom work. Knowing about potential extra costs upfront can help you better plan your budget.
- Do you offer any discounts or financing options? Some installers may offer discounts for large projects or special promotions. Additionally, inquire about financing options that can make the cost of the project more manageable over time.
Expertise Questions
It’s essential to ensure that the installer you choose has the experience and expertise needed to handle your specific window replacement project.
- How long have you been in business? Experience matters when it comes to window installation. A company with many years in the business is likely to have more expertise and a track record of successful projects.
- Can you provide references or examples of past work? Ask for references from previous clients or examples of similar projects the installer has completed. This can give you a sense of the quality of their work and their reliability.
- Are you licensed and insured? Ensure that the installer is properly licensed to work in your area and carries adequate insurance, including liability insurance and workers’ compensation. This protects you in case of accidents or damage during the installation.
Questions About the Installation Process
- What is your installation process? Understanding the installer’s process can help you know what to expect during the project. Ask about the steps they take, how long the installation will take, and how they handle unexpected issues.
- Who will be doing the installation? Sometimes, the person who provides the estimate isn’t the same person who will be doing the installation. Make sure you know who will be working on your project and confirm that they have the necessary experience and qualifications.
- How do you handle unexpected issues? Ask the installer how they handle problems that may arise during the installation, such as discovering structural damage or needing to make adjustments to the window opening. It’s important to know that they have a plan in place for dealing with challenges.
Timeline Questions
Knowing the timeline for your project helps you plan accordingly and ensures that the work is completed within a reasonable timeframe.
- What is your estimated timeline for this project? Ask for an estimated start and completion date for the project. Knowing the timeline will help you plan around the installation and set expectations for how long the process will take.
- What happens if there are delays? Delays can happen for various reasons, such as weather, supply chain issues, or unexpected complications. Ask the installer how they handle delays and whether they have contingency plans in place.
Other Questions
Finally, there are a few additional questions that can help you assess the installer’s professionalism and ensure that you’re making the best choice for your project.
- Do you offer a warranty on your work? A good installer should stand behind their work with a warranty. Ask about the details of the warranty, including what it covers and how long it lasts.
- How do you protect my home during the installation? Installing windows can be a messy job, so it’s important to know how the installer will protect your home’s interior and exterior during the process. Ask about the measures they take to minimize dust, debris, and damage.
- What happens if there are issues after installation? Inquire about the process for addressing any problems that might arise after the installation is complete. It’s important to know that the installer will be responsive and available to fix any issues that come up.
How to Reduce Window Replacement Costs
Window replacement can be a significant financial investment, but there are several strategies you can use to reduce the overall cost without sacrificing quality. Here are some tips to help you save money on your window replacement project.
Choose the Right Time of Year
The timing of your window replacement project can have a big impact on the cost. Window installers are often busier during certain times of the year, such as spring and summer, which can drive up prices.
- Off-Season Discounts: Consider scheduling your window replacement during the off-season, typically in late fall or winter. During these times, demand is lower, and some contractors may offer discounts or lower prices to keep their crews busy.
- Plan Ahead: If you know you’ll need to replace your windows, start planning early. This gives you more flexibility to choose a time when prices are lower and avoid the rush during peak seasons.
Consider Window Material and Style
The material and style of your windows play a significant role in determining the overall cost. By carefully selecting the right options, you can save money without compromising on quality.
- Opt for Vinyl Windows: Vinyl windows are among the most cost-effective options available. They offer good insulation, durability, and low maintenance at a lower price point than materials like wood or fiberglass.
- Standard Sizes vs. Custom Windows: Standard-sized windows are generally less expensive than custom-made options. If your home can accommodate standard sizes, you can save a significant amount on the cost of the windows themselves.
- Simpler Styles: Window styles that require less hardware and labor to install, such as single-hung or double-hung windows, are often more affordable than more complex designs like bay or casement windows.
Take Advantage of Rebates and Tax Credits
There are various rebates and tax credits available that can help offset the cost of window replacement, especially if you’re upgrading to energy-efficient windows.
- Energy-Efficient Tax Credits: The federal government, as well as some state and local governments, offer tax credits for energy-efficient home improvements, including window replacement. These credits can reduce your overall tax liability, effectively lowering the cost of your project.
- Utility Company Rebates: Some utility companies offer rebates or incentives for installing energy-efficient windows. Check with your local utility provider to see if any programs are available in your area.
Consider Partial Replacement
If replacing all the windows in your home at once is too costly, consider doing a partial replacement instead.
- Prioritize Problem Areas: Focus on replacing the windows that are in the worst condition or that have the biggest impact on your home’s energy efficiency. This allows you to spread the cost over time and tackle the project in phases.
- Combine with Other Projects: If you’re planning other home improvements, such as siding or roof replacement, consider combining projects. Some contractors offer discounts for larger projects, which can reduce the overall cost of window replacement.
DIY Some Aspects of the Project
While installing windows yourself can be risky if you’re not experienced, there are some aspects of the project that you might be able to handle to save money.
- Remove Old Windows Yourself: If you’re comfortable with basic demolition work, you might be able to save on labor costs by removing the old windows yourself before the professional installer arrives.
- Painting and Finishing: After the windows are installed, you can save money by handling the painting, staining, or finishing work yourself. This is a task that requires less technical skill and can easily be done as a DIY project.
Get Multiple Quotes
Finally, one of the best ways to reduce costs is to shop around and get multiple quotes from different contractors.
- Compare Prices: Request quotes from at least three different window installers to compare prices. Be sure to ask for detailed breakdowns of the costs so you can see exactly what is included in each quote.
- Negotiate: Don’t be afraid to negotiate with contractors. If you have a lower quote from another company, ask your preferred installer if they can match or beat the price. Many contractors are willing to work with you to earn your business.