
Replacing windows is a significant investment, and many homeowners wonder whether they can save money by doing it themselves. While DIY window replacement is possible, it’s important to evaluate the benefits and challenges before committing to the project. In this article, we’ll explore the pros and cons of DIY window replacement and whether it’s difficult to replace a window on your own.
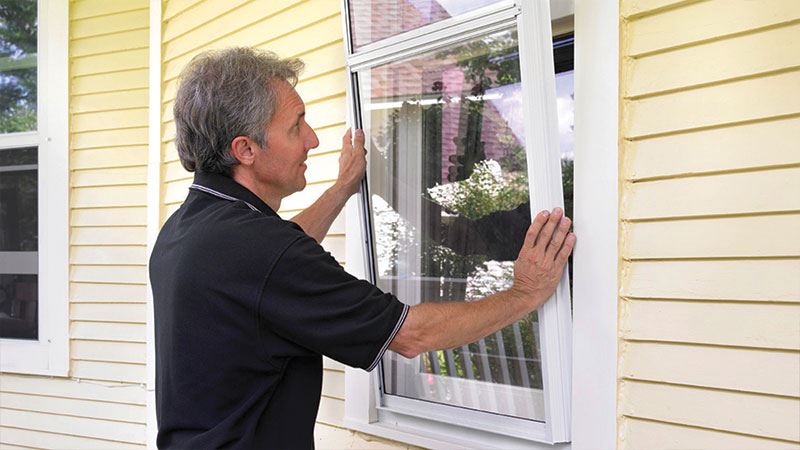
Table of Contents
The Pros and Cons of DIY Window Replacement
Cost Savings
One of the main benefits of DIY window replacement is the potential to save money. By skipping professional labor, you can reduce the overall cost of your project, which can be particularly appealing if you’re replacing several windows at once. For a detailed look at the cost of windows, check out this comprehensive guide on window replacement costs in 2024.
Flexibility in Scheduling
DIY projects allow you to work on your own schedule. Unlike hiring a contractor, you won’t have to wait for an available time slot, giving you the freedom to plan and complete the job at your convenience.
Hands-On Experience
For those who enjoy home improvement, installing windows can provide valuable hands-on experience. Gaining skills in this area may prove useful in future home projects, and there’s a sense of accomplishment in completing a task yourself.
Customization
When you handle the installation yourself, you have control over the process. You can customize everything from the insulation materials to the way the window is framed to best suit your preferences and home’s needs.
The Cons of DIY Window Installation
Lack of Expertise
Professional window installers have years of experience that ensures the job is done correctly. If you don’t have the same level of expertise, you run the risk of improper installation, which could lead to issues like drafts, leaks, or reduced energy efficiency.
Time-Consuming and Labor-Intensive
Window replacement can be a time-consuming and physically demanding task, especially for beginners. While a professional crew may replace several windows in a single day, a DIYer could spend significantly more time completing the same project.
Potential for Damage
Removing old windows and installing new ones can result in accidental damage to the surrounding structure. Without proper knowledge, you could damage the window frame, exterior siding, or interior walls, leading to additional repair costs.
Impact on Warranty
Many window manufacturers only honor warranties if their products are installed by certified professionals. By installing the windows yourself, you could void the warranty, which would leave you responsible for any defects or future repairs. This is especially important to keep in mind when considering vinyl replacement windows.
Safety Concerns
Window replacement often involves working at heights, handling heavy glass, and operating power tools. For multi-story homes, this can be particularly dangerous without the proper safety equipment and training.
Is it Hard to Replace a Window Yourself?
Skill Level Required
The difficulty of replacing a window yourself varies depending on the type of window. Insert windows, which fit into an existing frame, are generally easier for beginners. However, full-frame replacements, where the entire window and frame are removed and replaced, require advanced skills in carpentry, insulation, and sealing.
Common Challenges
DIY window replacement presents several challenges. Precise measurement is critical to ensure the window fits correctly, and poor installation can result in drafts, leaks, or compromised energy efficiency. Accurate window measurements are essential to avoiding these issues. Working with large windows can also be physically demanding, and ensuring the window is level and properly sealed requires attention to detail.
Tasks for Beginners vs. Professionals
If you’re familiar with basic home improvement tasks and have experience using tools, replacing simple insert windows might be manageable. However, full-frame replacements, windows in multi-story homes, and custom windows are better left to professionals due to their complexity and safety requirements.
Can You Legally Install Your Own Windows?
Building Codes and Permits
Before jumping into a DIY window replacement project, it’s essential to understand local building codes and permit requirements. Many areas have specific regulations governing window installations, particularly concerning energy efficiency, safety, and structural integrity. In some regions, a permit may be required to replace windows, even if you’re doing the work yourself. Ensuring you meet all legal requirements will help avoid fines, penalties, or complications during a future home sale.
Regional Variations
Laws and codes vary by location. For example, certain areas may require windows to meet specific hurricane or earthquake standards, depending on local weather and geographic conditions. Before beginning the project, research your local laws or consult with your local building authority to ensure compliance with any specific regulations related to window replacement.
The Importance of Permits
Even when doing the work yourself, securing the proper permits is crucial. Permits ensure that the installation meets local safety standards and is inspected by officials to verify proper installation. Not pulling a permit can lead to problems when selling your home or might even result in fines. In many cases, homeowners find it easier to hire a professional who understands the permitting process and can handle it on their behalf. You can learn more about window replacement financing and related regulations to ensure you’re fully informed before beginning the project.
Is It Cheaper to Replace Your Own Windows?
Cost Comparison
At first glance, DIY window replacement seems like a cost-saving solution. Without having to pay for labor, you could potentially save a significant amount of money. However, the savings aren’t always as substantial as they appear. You’ll need to account for the costs of tools, materials, and potential mistakes. In some cases, hiring a professional may actually be more cost-effective in the long run, especially if you avoid mistakes that lead to costly repairs.
Tool and Material Costs
While professional installers come with the necessary tools and equipment, DIYers will need to purchase or rent specialized tools like power drills, levels, caulk guns, and more. Additionally, materials like insulation, flashing, and caulk can add up quickly. Be sure to factor in these additional costs when considering DIY.
Long-Term Value
Even though DIY installation might seem cheaper upfront, professional installations often come with warranties that protect your investment over time. If you install the windows yourself and run into problems, you’ll likely have to cover any repair or replacement costs out of pocket. The long-term value of professional installation—especially with the warranty and expertise it offers—can outweigh the initial savings of a DIY job.
When DIY Can Be Cost-Effective
For simpler projects, such as replacing a few windows in a single-story home, DIY can be a cost-effective option, particularly if you already own the necessary tools. If the windows are standard sizes and easily accessible, and you feel confident in your skills, the DIY approach may help you save some money.
Should You Replace Your Own Windows?
When DIY is a Good Option
DIY window replacement can be a good choice for homeowners with prior experience in home improvement projects, especially if you’re dealing with simpler, insert-style windows. Single-story homes with easy access and standard-sized windows present fewer challenges, making them more manageable for DIYers. If you already have some carpentry skills and feel comfortable using tools, replacing your own windows can be a rewarding project that allows you to save on labor costs.
When to Hire a Professional
There are scenarios where DIY window replacement may not be the best option. Complex installations, such as full-frame replacements or custom windows, often require a higher level of expertise to ensure proper fit, insulation, and waterproofing. Additionally, if your home has structural issues, uneven walls, or you’re replacing windows on a second or third story, hiring a professional is usually the safer choice. Professionals also bring the benefit of warranties and insurance, which provide protection against faulty installations or future repairs.
Assessing Your Comfort Level
Before starting a DIY project, ask yourself whether you feel comfortable handling the work involved. Do you have the necessary tools, time, and skills to complete the job correctly? If you have doubts, or if the project seems too complex, it’s often worth investing in a professional to avoid costly mistakes and ensure your windows perform as intended. For more advice on replacing individual windows, check out this guide on replacing a single window.
Tools and Materials Needed for DIY Window Replacement
Tools
Replacing windows requires several essential tools, many of which you may already have if you’re an experienced DIYer. Here’s a list of the key tools you’ll need:
- Measuring Tape: Accurate measurements are crucial for a successful installation.
- Pry Bar: Useful for removing old window frames and trim without damaging the surrounding area.
- Utility Knife: For cutting insulation, caulk, and other materials.
- Drill and Drill Bits: Needed for securing the new window in place.
- Level: Ensures the window is installed evenly and properly aligned.
- Caulk Gun: Used to apply sealant around the edges of the window for a weather-tight seal.
- Putty Knife: Helpful for scraping away old caulk and debris from the window frame.
- Hammer and Nails/Screws: Used to secure the window and frame.
- Safety Gear: Gloves, safety glasses, and possibly a harness if working at heights.
Materials
The materials you use during a window replacement will depend on the type of windows you’re installing and the condition of your home’s walls. Here’s a list of common materials required:
- Replacement Windows: The new windows you’re installing, typically ordered to your specific measurements.
- Insulation: Expanding foam or fiberglass insulation to fill any gaps around the window frame.
- Flashing Tape: A waterproof barrier used to prevent leaks around the window edges.
- Caulk: Used to seal the exterior edges of the window and provide weatherproofing.
- Shims: Small wedges used to adjust the window frame and ensure it’s level and square in the opening.
- Trim and Molding: Decorative trim to finish the window installation and cover any gaps between the window and the wall.
How to Measure for Replacement Windows
Measure the Width
Start by measuring the width of the window opening at three points: the top, middle, and bottom. Use the smallest measurement to determine the window width. This ensures the new window will fit even if the frame isn’t perfectly square. Check out this detailed guide on how to measure replacement windows.
Measure the Height
Measure the height of the window opening at three points: the left, middle, and right sides. Again, use the smallest measurement for the window height.
Check for Squareness
Use a tape measure or level to measure diagonally from corner to corner inside the window opening. Compare the two diagonal measurements. If they are equal, your window opening is square. If they differ by more than a quarter inch, you may need to adjust your installation approach to accommodate the out-of-square opening.
Depth Measurement
Measure the depth of the window frame from the inside edge to the outside edge. Ensure your replacement window will fit the depth of the existing frame without protruding or sinking too far into the wall.
Recording the Measurements
Once you have the width, height, and depth measurements, record them accurately. Most manufacturers will want you to round down to the nearest one-eighth inch to ensure a snug fit. Double-check your measurements before ordering your new windows to avoid costly mistakes.
How to Remove the Old Window
Prepare the Area
Before you start, ensure the work area is clear of obstacles and that you have a safe place to work. Lay down a drop cloth to protect your flooring and gather your tools. Make sure you’re wearing gloves and safety glasses, especially when handling glass.
Remove the Interior Trim
Use a utility knife or pry bar to carefully remove the interior window trim and casing. Take care not to damage the wall or the trim if you plan to reuse it. Cutting along the caulk lines before prying will help avoid peeling paint or drywall damage.
Detach the Old Window
If you’re replacing an insert window, you’ll need to remove the screws or nails holding the window in place. For a full-frame window replacement, you’ll also need to remove the exterior trim and any fasteners securing the window frame. Be cautious as you remove the old window to avoid breaking the glass or damaging the surrounding area.
How to Install the New Window
Dry Fit the New Window
Before applying any sealant or fasteners, place the new window into the opening to ensure it fits properly. Check that the window is level, plumb, and square within the frame. If adjustments are needed, use shims to make the window fit perfectly.
For more info about shims, check out this website.
Apply Caulk to the Exterior
Remove the window after the dry fit and apply a generous bead of exterior-grade caulk to the outside edge of the window frame where it will meet the wall. This creates a weatherproof barrier to keep moisture and drafts out.
Position the Window
Carefully set the window into the opening, pressing it into the caulk. Make sure the window is centered and properly aligned. Use shims around the edges to adjust the window so that it remains level and plumb. Check all sides to ensure it is properly positioned.
Secure the Window
Once the window is in place and aligned, use screws or nails to secure it through the pre-drilled holes in the window frame. Be careful not to overtighten, as this could warp the frame. Continue to check that the window is level and plumb as you secure it.
Insulate Around the Frame
After securing the window, fill the gaps between the window frame and the wall with insulation. Use expanding foam or fiberglass insulation to prevent air leaks. Be cautious with expanding foam, as too much can cause the window frame to bow.
Install the Interior Trim
Reattach the interior trim and casing around the window. Use finish nails or screws to secure the trim, and caulk the edges to create a seamless finish. This step not only improves the window’s appearance but also helps to seal any small gaps that could let in drafts.
Caulk the Exterior
Apply a final bead of caulk around the exterior edges of the window where it meets the siding or brick. Smooth the caulk with your finger or a caulking tool to ensure a clean finish. This step is crucial for weatherproofing and protecting your home from moisture infiltration.
Check Window Operation
Once the installation is complete, test the window to ensure it opens, closes, and locks properly. Make any necessary adjustments before the caulk and insulation set fully. Following these steps closely will help ensure your windows are properly aligned, sealed, and insulated for maximum efficiency and longevity.

Disposal of Old Windows
Recycling Old Windows
Many parts of a window, such as the glass, metal, and sometimes the wood frame, can be recycled. Check with your local recycling center to see if they accept old windows. Some centers may require you to separate the materials, such as removing the glass from the frame before recycling.
Donating Usable Windows
If your old windows are still in good condition, consider donating them to organizations like Habitat for Humanity or other local charities that accept building materials. Donated windows can be reused in other construction projects, reducing waste and benefiting your community.
Disposing of Hazardous Materials
Older windows, especially those with lead paint or single-pane glass, may contain hazardous materials. In such cases, you’ll need to take special precautions. Contact your local waste management facility to find out how to safely dispose of these materials. Lead paint, in particular, should not be disturbed or disposed of in regular trash due to its toxicity.
Landfill Disposal
If recycling or donating isn’t an option, you can dispose of the windows at a local landfill. Be sure to follow any specific guidelines for window disposal in your area. It’s often recommended to wrap the windows in plastic or cardboard to prevent injury during transportation and handling.
Hiring a Disposal Service
For those who want a hassle-free solution, hiring a disposal service might be the best option. Many window replacement companies offer disposal as part of their service, or you can hire a separate service to handle the removal and disposal of the old windows. This can be especially helpful if you’re dealing with large quantities or oversized windows.
Environmental Considerations
Whenever possible, opt for recycling or donation to minimize environmental impact. Disposing of windows responsibly helps reduce the amount of waste that ends up in landfills and supports sustainable practices in home improvement. Proper disposal of old windows not only helps the environment but also ensures that you’re complying with local regulations. By choosing the right disposal method, you can complete your window replacement project responsibly and efficiently.
Window Replacement Options
Full-Frame Replacement Windows
Full-frame replacement windows involve removing the entire window, including the frame, sash, and trim. This option is ideal when your window frames are damaged, rotting, or you want to change the size or style of the window. Full-frame replacements offer several benefits:
- Improved Insulation: By removing the entire frame, you can ensure that insulation is properly installed around the window, improving energy efficiency.
- Greater Flexibility: Full-frame replacements allow you to choose a completely different style or size of window.
- New, Clean Finish: Since the entire window is replaced, you get a fresh start with brand-new frames, sashes, and trim, which can greatly improve the appearance of your home.
However, full-frame replacements are more labor-intensive and costly compared to insert windows. The installation process is more involved and may require additional work, such as repairing or modifying the wall around the window.
Insert or Pocket Replacement Windows
Insert replacement windows, also known as pocket windows, fit inside the existing window frame. This type of replacement is best when the frame is still in good condition and you want to avoid the additional labor and expense of a full-frame replacement. Some key advantages include:
- Less Labor: Since the existing frame remains intact, the installation process is quicker and less invasive.
- Cost Savings: Insert windows are typically less expensive than full-frame windows because they require fewer materials and less labor.
- Minimal Disruption: The surrounding walls and trim remain untouched, which means less disruption to your home during installation.
The downside to insert windows is that they can only be used when the existing frame is in good shape. Additionally, they may slightly reduce the glass area of the window due to the new window fitting inside the old frame.
Choosing between full-frame and insert windows depends on the condition of your current window frames, your budget, and your overall goals for the replacement project.
Conclusion: Should You DIY Your Window Replacement?
After considering the pros and cons, legal aspects, costs, and installation process, you may still be wondering if DIY window replacement is the right choice for you. Here’s a final checklist to help you make your decision:
Skill and Comfort Level
Do you have experience with home improvement projects and feel comfortable using tools? If so, simple insert window replacements may be within your capabilities. However, if you’re dealing with complex installations, multi-story homes, or damaged window frames, hiring a professional may be a safer and more effective choice.
Time and Resources
Do you have the time to dedicate to a window replacement project? DIY window replacement can take significantly longer than hiring professionals, especially if you’re learning as you go. Be prepared to invest time in research, preparation, and execution.
Tools and Materials
Do you already own the necessary tools and materials, or are you willing to invest in them? The cost of purchasing or renting tools, along with buying insulation, caulk, and other materials, should be factored into your decision.
Budget
While DIY can save you money on labor costs, it’s essential to consider the potential risks of making mistakes, which can lead to costly repairs down the road. Weigh the upfront savings against the long-term value of professional installation, which often includes warranties.
Legal and Safety Considerations
Are you familiar with local building codes and permit requirements? Ensuring compliance with regulations is crucial for the safety of your home and the success of your project. Additionally, consider the physical demands and safety risks of working at heights or handling heavy materials.
In conclusion, DIY window replacement can be a rewarding and cost-effective project for experienced homeowners with the right tools, time, and skill set. However, if the project seems too complex or you’re concerned about making costly mistakes, hiring a professional may be the better option. Ultimately, the choice depends on your comfort level, project requirements, and willingness to take on the challenge.