You can fix drafty windows by adding weatherstripping ($2-$15 per window), caulking gaps around frames ($1-$3 per tube), installing storm windows ($150-$400 each), or applying window film ($3-$7 per square foot). Check for air leaks using a candle or incense, then seal gaps with appropriate materials. These solutions can reduce drafts by 10-30% and lower energy bills without the cost of full window replacement.
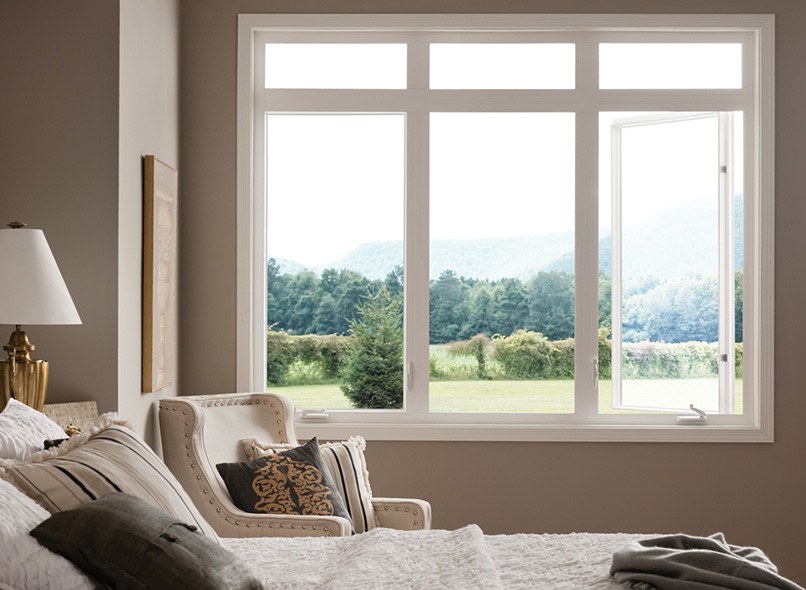
Identifying Sources of Window Drafts
Common Draft Locations
Where air leaks typically occur:
- Around window sashes and frames
- Between window frame and wall
- Through worn or missing weatherstripping
- Around window hardware and locks
- At sill and header connections
- Through cracked glazing compound
Window operation issues causing drafts:
- Warped or sagging sashes
- Worn window hardware
- Loose or damaged window locks
- Improperly aligned window components
- Deteriorated weatherstripping materials
DIY Draft Detection Methods
Simple leak detection techniques:
- Light a candle or incense stick and move slowly around window perimeter
- Feel for air movement with your hand on windy days
- Look for visible gaps or daylight around closed windows
- Use tissue paper to detect air movement near windows
- Check for moisture or ice buildup indicating air leaks
More thorough detection methods:
- Smoke pencil or draft detector tools ($15-$30)
- Thermal imaging with smartphone apps
- Professional energy audit with blower door testing
- Visual inspection with flashlight from both sides
Best conditions for detecting drafts:
- Windy days with temperature difference inside/outside
- Early morning or evening with calm indoor conditions
- Turn off HVAC systems to eliminate air movement confusion
- Check each window systematically room by room
Weatherstripping Solutions
Types of Weatherstripping Materials
Foam tape weatherstripping:
- Cost: $2-$5 per window
- Easy DIY installation
- Good for irregular gaps
- Compresses to fill spaces
- Lifespan: 1-3 years depending on quality
V-strip weatherstripping (spring bronze):
- Cost: $3-$8 per window
- Durable metal construction
- Professional appearance
- Effective for sliding windows
- Lifespan: 5-10 years with proper installation
Door sweep and threshold strips:
- Cost: $5-$15 per window
- Effective for bottom sash gaps
- Available in various materials
- Easy replacement when worn
- Good for horizontal sliding windows
Installation Techniques
Preparing surfaces for weatherstripping:
- Clean all surfaces thoroughly with degreasing cleaner
- Remove old weatherstripping completely
- Sand rough surfaces smooth
- Ensure surfaces are dry before installation
- Test window operation before permanent installation
Proper installation steps:
- Measure gap dimensions accurately
- Cut weatherstripping slightly longer than needed
- Install starting at one end, working systematically
- Avoid stretching or compressing during installation
- Test window operation frequently during installation
- Trim excess material with sharp knife
Common installation mistakes:
- Over-compressing weatherstripping causing operation problems
- Installing on dirty or rough surfaces
- Using wrong type for specific gap size
- Not testing operation before completing installation
- Leaving gaps between weatherstripping sections
Caulking and Sealing Techniques
Choosing the Right Caulk
Exterior caulking materials:
- Polyurethane caulk: Best durability, 20+ year lifespan
- Silicone caulk: Excellent flexibility, 10-20 years
- Acrylic latex: Paintable, easy cleanup, 5-10 years
- Hybrid sealants: Balance of properties, 15-20 years
Interior caulking options:
- Acrylic latex: Paintable, easy application
- Clear silicone: Invisible application
- Removable caulk: Temporary seasonal solutions
- Specialty gap fillers: For larger irregular gaps
Proper Caulking Technique
Surface preparation:
- Remove all old caulk completely with scraper
- Clean surfaces with alcohol or degreaser
- Ensure surfaces are completely dry
- Mask areas for clean, straight lines
- Have cleanup materials ready
Application best practices:
- Cut caulk tube tip at 45-degree angle
- Apply steady, continuous bead
- Tool immediately with finger or caulk tool
- Remove masking tape while caulk is wet
- Allow proper cure time before painting
Areas requiring caulking:
- Window frame to siding joints
- Interior trim to wall connections
- Sill and header gaps
- Around window hardware mounting
- Any visible gaps or cracks
Spray Foam Applications
When to use expanding foam:
- Large gaps (1/4 inch to 3 inches)
- Irregular shaped openings
- Areas where other sealants won’t work
- Behind trim that will be replaced
Spray foam application tips:
- Use minimal expanding foam for controlled application
- Wear gloves and protective clothing
- Work in temperatures above 60°F
- Trim excess foam after curing
- Paint or cover exposed foam to prevent UV degradation

Storm Windows and Window Film
Storm Window Options
Exterior storm windows:
- Cost: $150-$400 per window installed
- Maximum energy efficiency improvement
- Professional appearance
- Long-term durability (15-25 years)
- Custom fit for each window opening
Interior storm windows:
- Cost: $75-$200 per window
- Easier installation and removal
- Better access for maintenance
- Condensation control between panes
- Seasonal installation option
Temporary storm solutions:
- Plastic sheeting kits: $3-$8 per window
- Magnetic storm panels: $25-$75 per window
- Removable frames: $50-$150 per window
- Seasonal installation and storage
Window Film Applications
Shrink film kits:
- Cost: $3-$7 per square foot
- Easy DIY installation
- Creates dead air space for insulation
- Temporary seasonal solution
- Removes completely in spring
Installation process:
- Clean window surface thoroughly
- Apply double-sided tape around frame
- Cut film oversized and attach to tape
- Use hair dryer to shrink film tight
- Trim excess with sharp knife
Film application tips:
- Work in temperatures above 50°F
- Ensure windows are completely clean
- Apply tape to smooth, clean surfaces
- Heat film gradually for even shrinkage
- Avoid overheating which can damage film
Security and Decorative Films
Multi-purpose window films:
- Security films provide draft reduction plus protection
- Decorative films add privacy while reducing air infiltration
- UV-filtering films protect interiors and reduce thermal stress
- Insulating films designed specifically for energy savings
Professional vs. DIY installation:
- DIY suitable for small windows and temporary solutions
- Professional installation for large windows and permanent applications
- Warranty considerations for different installation methods
- Cost comparison including time and material costs

Hardware Adjustments and Repairs
Window Lock and Hardware Issues
Common hardware problems causing drafts:
- Loose window locks allowing sash movement
- Worn cam locks not pulling sash tight
- Damaged window cranks affecting seal pressure
- Bent or damaged window hardware
- Missing or broken lock components
Hardware adjustment techniques:
- Tighten loose screws in lock mechanisms
- Adjust cam locks for proper sash compression
- Lubricate moving parts for better operation
- Replace worn weatherstripping around hardware
- Align sashes properly for even seal compression
Sash Alignment Solutions
Identifying alignment problems:
- Visible gaps when window is closed
- Uneven compression of weatherstripping
- Difficulty closing or locking windows
- Daylight visible around closed sash
- Rattling during wind or operation
DIY alignment corrections:
- Adjust hinge screws for better sash positioning
- Add shims behind hinges if needed
- Tighten loose frame connections
- Replace worn pivot pins or hardware
- Adjust strike plates for better lock engagement
When to call professionals:
- Structural frame problems
- Major sash warping or damage
- Window balance system failures
- Complex hardware replacement needs
- Safety concerns with window operation
Seasonal and Temporary Solutions
Winter Draft Protection
Immediate winter solutions:
- Heavy curtains or drapes for insulation
- Draft stoppers for window sills
- Temporary plastic sheeting
- Removable weatherstripping for rental properties
- Blankets or quilts for emergency situations
Seasonal weatherproofing:
- Install storm windows before cold weather
- Apply window film in fall, remove in spring
- Add extra weatherstripping for winter months
- Use rope caulk for temporary sealing
- Install window quilts or insulated panels
Summer Preparation
Preparing for cooling season:
- Remove temporary winter solutions
- Clean and inspect permanent weatherstripping
- Ensure proper window operation for ventilation
- Apply UV-filtering films if needed
- Check caulking condition after winter weather
Hot climate considerations:
- Shade windows to reduce thermal stress
- Ensure adequate ventilation around windows
- Use reflective films to reduce heat gain
- Maintain weatherstripping for cooling efficiency
- Consider awnings or exterior shading
Rental Property Solutions
Tenant-friendly draft reduction:
- Removable weatherstripping options
- Temporary caulking materials
- Window film that removes cleanly
- Portable storm window panels
- Draft stoppers that don’t require installation
Landlord-approved improvements:
- Check lease agreements for modification rules
- Focus on removable and reversible solutions
- Document condition before and after improvements
- Use damage-deposit friendly materials
- Get written permission for permanent changes
Cost-Benefit Analysis of Draft Reduction
Energy Savings Calculations
Typical savings from draft reduction:
- Weatherstripping: 5-15% reduction in heating/cooling costs
- Caulking: 3-8% energy cost reduction
- Storm windows: 10-25% energy savings
- Window film: 8-15% heating cost reduction
- Combined measures: 15-30% total potential savings
Payback period estimates:
- DIY weatherstripping: 1-2 heating seasons
- Professional caulking: 2-3 years
- Storm windows: 3-7 years
- Window film: 1-3 heating seasons
- Comprehensive approach: 2-5 years typical
Cost Comparison to Replacement
Draft reduction costs vs. window replacement:
- DIY draft fixes: $25-$100 per window
- Professional draft reduction: $75-$200 per window
- New window replacement: $300-$800 per window
- Storm windows: $150-$400 per window
When draft reduction makes sense:
- Windows in good structural condition
- Budget constraints preventing replacement
- Rental properties with limited improvement options
- Temporary solutions while planning replacement
- Historic windows requiring preservation
Long-Term Maintenance Considerations
Ongoing maintenance requirements:
- Annual inspection of weatherstripping
- Periodic caulk touch-ups
- Storm window seasonal installation/removal
- Window film replacement every 3-5 years
- Hardware adjustment and lubrication
Replacement schedules:
- Foam weatherstripping: 1-3 years
- Quality weatherstripping: 5-10 years
- Caulking: 5-20 years depending on material
- Window film: 3-7 years
- Storm windows: 15-25 years
Professional vs. DIY Approaches
DIY-Friendly Solutions
Easy homeowner projects:
- Basic weatherstripping installation
- Simple caulking applications
- Window film installation
- Draft detection and assessment
- Hardware cleaning and lubrication
Tools and materials needed:
- Caulk gun and appropriate caulk
- Weatherstripping materials
- Utility knife and measuring tape
- Cleaning supplies and rags
- Basic hand tools for hardware adjustment
When to Hire Professionals
Professional services worthwhile for:
- Custom storm window installation
- Complex weatherstripping systems
- Structural window adjustments
- Large-scale caulking projects
- Energy audits and comprehensive assessments
Professional advantages:
- Access to commercial-grade materials
- Experience with difficult installations
- Warranty coverage on work performed
- Proper tools and safety equipment
- Knowledge of best practices and techniques
Choosing Quality Materials
Investing in better materials:
- Higher-grade weatherstripping lasts longer
- Premium caulks provide better durability
- Quality storm windows offer better performance
- Professional-grade films resist wear better
- Proper tools improve installation quality

The Bottom Line
Fixing drafty windows without replacement is often possible and cost-effective using weatherstripping, caulking, storm windows, and window film. These solutions can reduce energy costs by 10-30% at a fraction of the cost of window replacement.
The key is systematic identification of air leak sources followed by appropriate sealing techniques. Start with the most cost-effective solutions like weatherstripping and caulking before considering more expensive options like storm windows.
While draft reduction techniques can significantly improve comfort and energy efficiency, they work best on windows that are structurally sound. If windows have major operational problems, frame damage, or multiple seal failures, replacement may be more cost-effective than continued repairs.
Plan draft reduction work seasonally, with major improvements completed before heating or cooling seasons. Many solutions can be DIY projects, but don’t hesitate to hire professionals for complex work or when safety is a concern.
At Utah Window Experts, we can assess your drafty windows and recommend the most cost-effective solutions, whether that’s professional weatherproofing, storm windows, or replacement. Our team understands when draft reduction techniques are worthwhile and when replacement provides better long-term value.